



Table of Contents
- Climbing Gear Essentials: What You Actually Need
- Rock Climbing Gear Checklist by Climbing Type
- Beginner Climbing Gear: Where to Start
- Indoor Climbing Essentials and What You Can Skip
- Climbing Trip Packing List: Gear, Clothing, and Contingencies
- Safety Checks, Fit, and When to Retire Gear
- Rent, Borrow, or Buy: Making the Right Choice
- Conclusion
- Frequently Asked Questions
Last Updated: October 5, 2026
Climbing Gear Essentials: What You Actually Need
Climbing gear essentials are the tools and equipment that keep you safe, comfortable, and prepared on rock, ice, or indoor walls. Whether you're starting your first climb or tackling alpine routes, having the right climbing gear essentials matters more than having expensive gear.
The difference between climbers who enjoy their trips and those who struggle often comes down to one thing: they started with a clear picture of what they actually need. Not what influencers post. Not what fills a catalog. What works for your specific climbing type.
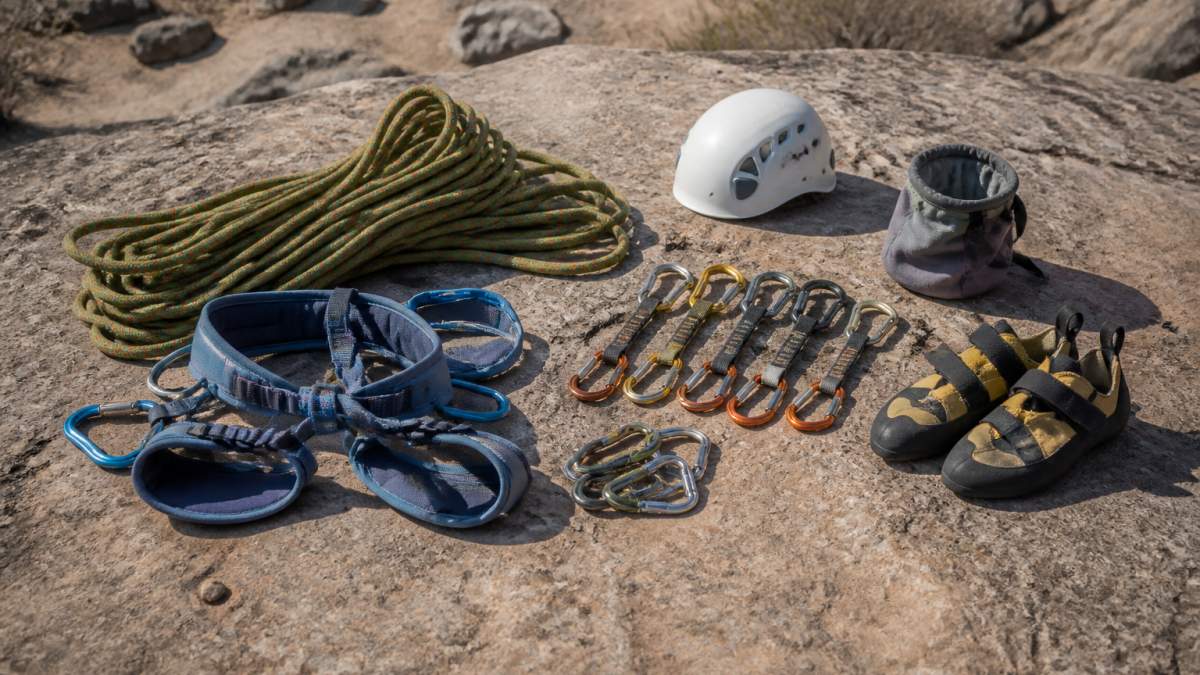
Below, we'll walk you through every climbing gear essential you need, broken down by climbing type. We'll show you what to buy, what to borrow, and what you can skip. You'll also learn when gear needs to retire and how to pack smart for any climbing trip.
Rock Climbing Gear Checklist by Climbing Type
Not all climbing looks the same. Neither should your gear list.
Outdoor Rock Climbing
Outdoor rock climbing requires a complete rope system, protection devices, and proper safety equipment. This is where most climbing gear essentials live.
Core gear for outdoor rock climbing:
- Rope (70-meter, 9-11mm diameter for most routes)
- Harness (sits on your waist and thighs)
- Belay device (controls rope tension during belaying)
- Quickdraws (connect your rope to fixed anchors)
- Carabiners (locking and non-locking for different uses)
- Climbing shoes (specialized footwear for grip)
- Helmet (protects your head from falling rock and impacts)
- Chalk and chalk bag (improves grip on holds)
- Climbing pack (carries your gear to the crag)
The rope is your lifeline. A 70-meter rope lets you climb most single-pitch routes. Rope diameter matters, thinner ropes are lighter but wear faster. Most climbers use 9.5mm to 11mm diameter ropes.
Your harness distributes your weight across your waist and thighs. A good fit means it sits snug without cutting into your hips. Many climbers rent harnesses first before buying, since comfort is personal.
The belay device manages rope friction. It slows your partner's fall and lets you lower them safely. Common types include tube devices and assisted-locking devices. Assisted devices are easier for beginners but cost more.
Quickdraws and protection connect you to the rock. Quickdraws are short slings with carabiners on each end. They clip your rope to bolts.
Climbing shoes have stiff soles and sticky rubber. They let your feet grip tiny holds. Rent before you buy, your first pair will feel strange.
A helmet is non-negotiable. Falling rock, loose gear, and accidental head bumps happen. A helmet lasts years.
Alpine and Winter Climbing
Alpine climbing adds layers of complexity. You need everything from rock climbing, plus specialized gear for snow, ice, and extreme cold.
Additional climbing gear essentials for alpine:
- Ice axes (for climbing ice and self-arrest)
- Crampons (metal spikes that attach to boots)
- Winter climbing boots (insulated, compatible with crampons)
- Ice screws (protection for ice climbing)
- Avalanche beacon (locates buried climbers)
- Shovel (for avalanche rescue and camp setup)
- Layers and insulation (base, mid, outer shells)
- Gloves and mitts (keep hands warm and functional)
- GPS watch or guide notes (navigation in whiteout conditions)
Ice axes serve two purposes: climbing vertical ice and self-arrest if you fall. A good ice axe lasts a decade.
Crampons strap to your boots and add metal points underneath. They give you grip on ice and frozen terrain. Fit matters, loose crampons are dangerous.
Winter boots must be insulated and rigid enough for crampons. They're heavier and stiffer than summer climbing boots. Many climbers buy once and use for years.
Avalanche gear, beacon, shovel, probe, is mandatory in avalanche terrain. A beacon lets rescuers find you if you're buried. You should train with this gear before you need it.
Beginner Climbing Gear: Where to Start
Most beginners make the same mistake: they buy a full rack before their first climb.
Start small. Buy only what you need for your first 5-10 climbs. Everything else can wait.
Beginner climbing gear essentials checklist:
- Climbing shoes (rent for first 3-5 climbs)
- Harness (rent or buy basic model)
- Belay device (simple tube device, $15-30)
- Carabiners (2-3 basic non-locking, $10-15 each)
- Chalk and chalk bag ($10-20 total)
- Helmet (buy this one, $50-100)
- Climbing pack (small daypack, $40-80)
Rent shoes and harness first. This costs $5-10 per visit and lets you figure out your fit without committing money. After 5-10 visits, you'll know if climbing sticks and what you actually prefer.
A basic belay device works for most climbing.
Your first helmet is the most important purchase. Don't cheap out here. A good helmet protects your life.
A chalk bag keeps your hands dry and your grip strong. This is one of the cheapest and most useful gear purchases you'll make.
Many gyms loan carabiners and quickdraws. Ask before you buy. You might not need them yet.
Indoor Climbing Essentials and What You Can Skip
Indoor climbing gyms simplify everything. You can skip most outdoor gear.
What you actually need for indoor climbing:
- Climbing shoes (rent or buy)
- Chalk and chalk bag
- Water bottle
- Small towel
That's it. The gym provides ropes, harnesses, belay devices, and safety systems. Staff manage safety checks. You don't need your own rope, carabiners, or protection gear.
Many beginners buy expensive gear before trying indoor climbing. Don't. Rent shoes for your first month. Bring chalk and water. See if you like climbing.
If you stick with indoor climbing for 6+ months, then invest in shoes. Rental shoes wear out fast. After 25 visits, you've spent $125 on rentals. A decent pair of climbing shoes costs $80-120.
Skip buying a harness for indoor climbing. Gyms provide harnesses and wash them regularly. Buying your own doesn't add value.
Skip carabiners, ropes, and quickdraws entirely for indoor climbing. The gym handles all of that.
Climbing Trip Packing List: Gear, Clothing, and Contingencies
A climbing trip requires more than just climbing gear essentials. You need clothing, food, water, and backup items.
Climbing gear to pack:
- Rope and protection (cams, slings, carabiners)
- Harness, belay device, helmet
- Climbing shoes, climbing socks
- Chalk bag, extra chalk
- Quickdraws (8-12 for single-pitch)
- Carabiners (2-3 locking for anchors)
- Sling for rappel or anchor backup
Clothing to pack:
- Base layers (moisture-wicking material)
- Mid layers (fleece or wool for warmth)
- Outer shell (wind and rain protection)
- Climbing pants or shorts
- Extra socks (climbing socks are thin and wear fast)
- Gloves or mitts (even in summer, nights get cold at altitude)
- Hat or headlamp for early starts
Food and water:
- 2-3 liters of water capacity
- High-calorie snacks (nuts, bars, dried fruit)
- Lunch for a full climbing day
- Electrolyte drink for longer climbs
Contingencies:
- First aid kit (blister supplies, pain relief, bandages)
- Sunscreen and lip balm
- Insect repellent
- Repair tape for gear
- Extra carabiners (one breaks, you have backup)
- Headlamp with extra batteries
- Multi-tool
Pack weight matters. Heavy packs tire you faster and increase injury risk. Weigh your pack before you go. Most climbers aim for 20-30 pounds total, including water.
Layering beats bulky jackets. Multiple thin layers let you adjust as temperatures change. You can remove layers as you warm up during climbing.
Safety Checks, Fit, and When to Retire Gear
Gear fails when you don't maintain it. Learn to inspect your equipment.
Safety checks before every climb:
- Rope: Check for cuts, fraying, or discoloration. Feel for soft spots that indicate damage inside.
- Harness: Check stitching for tears. Make sure all attachment points are intact.
- Carabiners: Ensure gates open and close smoothly. Check for cracks or bends.
- Belay device: Clean out chalk dust. Test that it moves freely.
- Helmet: Look for cracks or dents. Replace if you've taken a hard hit.
Fit matters as much as function. A harness that's too loose slides during climbing. One that's too tight cuts off circulation. Try on different sizes before buying.
When to retire gear:
- Rope: After 5-7 years of regular use, or immediately if cut, burned, or soaked in chemicals
- Harness: After 10+ years, or if stitching is torn or attachment points are damaged
- Helmet: After one significant impact, or after 10 years
- Climbing shoes: When the rubber is worn smooth or the sole separates from the upper
- Carabiners: If bent, cracked, or the gate doesn't close smoothly
Retired gear should be discarded or recycled. Don't give worn climbing gear to friends, it's a liability. Some gear manufacturers have recycling programs.
Rent, Borrow, or Buy: Making the Right Choice
Every climber faces this decision. The answer depends on frequency and commitment.
Rent if:
- You're climbing fewer than 5 times per year
- You're trying a new climbing type (indoor to outdoor, rock to ice)
- You're testing gear before buying
- You're traveling and don't want to pack gear
Rental costs $5-15 per item per day. For occasional climbers, this beats storage and maintenance.
Borrow if:
- You have experienced climber friends with extra gear
- You're trying climbing before investing
- You're borrowing from someone who maintains their gear well
Only borrow from people you trust. Borrowed gear that fails creates liability and could injure you.
Buy if:
- You climb 10+ times per year
- You know your preferences (shoe size, harness fit, rope thickness)
- You're committed to maintenance and storage
- You want gear that matches your style
A basic outdoor climbing gear setup for essentials. That breaks even after 40-50 rental visits.
Many climbers buy core items (shoes, harness, chalk bag) and rent specialized gear (ropes, protection). This balances cost and flexibility.
Conclusion
Climbing gear essentials aren't complicated. Start with a rope, harness, belay device, climbing shoes, helmet, and chalk. Learn to inspect your gear. Buy what you'll use frequently. Rent or borrow the rest.
The real skill isn't buying expensive gear, it's knowing what you actually need for your climbing type and experience level. A beginner on a budget can climb safely with basic gear. A veteran climber knows exactly what specialized equipment makes their climbing better.
At VIRR Store, we celebrate climbers who push beyond the familiar. Our designs honor real climbing stories, real people, and real achievements, from the Slovak Direct on Denali to countless unnamed crags where climbers discover what they're capable of. Every piece of VIRR apparel carries a story of stamina, vigor, and force.
Explore our climbing-inspired designs and join a community that values authenticity, adventure, and giving back. A portion of every purchase supports the Balin Scott Miller Foundation, providing essential climbing gear grants to young climbers under 24 with financial need. Select options to find designs that match your climbing journey.
Frequently Asked Questions
What climbing gear essentials do beginners need to buy first?
Start with climbing shoes, a harness, a chalk bag, and a belay device. These four items cover basic indoor gym climbing and simple outdoor top-rope setups. Add a helmet and quickdraws once you progress to lead climbing or outdoor crags. Ropes, cams, and slings come later as you develop technique and move into more technical climbing. Many beginners rent or borrow gear initially to test what works before investing in personal equipment.
What's the difference between indoor climbing essentials and outdoor rock climbing gear?
Indoor gym climbing requires minimal gear: climbing shoes, chalk, and sometimes a harness and belay device, depending on the gym. Outdoor rock climbing adds protection equipment like cams, slings, quickdraws, and a rope system. You also need a helmet for outdoor climbing due to rockfall and environmental hazards. Weather protection and navigation tools (GPS watch, guide notes) become essential for outdoor trips, especially on multi-pitch routes or alpine climbing adventures.
How do I know when climbing gear should be retired or replaced?
Retire ropes after 5-10 years or sooner if they show core damage, significant wear, or have taken multiple falls. Harnesses last 10+ years with proper care but should be replaced if webbing tears or stitching fails. Climbing shoes wear out after 100-200 hours of use. Helmets should be replaced after any impact or every 5-7 years. Cams and slings degrade with use and impact; inspect them regularly for cracks or bent lobes. Check all gear before each climbing trip for safety.
Should I rent, borrow, or buy climbing gear when starting out?
Rent or borrow for your first 5-10 climbing sessions to test the sport without major investment. Once you're committed, buy climbing shoes and a harness first—these are personal-fit items that affect comfort and safety. Borrow or rent ropes, cams, and protection gear until you understand your climbing style and budget. Many climbing communities have gear libraries or loan programs. Buy protection equipment and advanced gear only after you've developed solid technique and know your preferred climbing types.